

What’s the actual reason most content calendars fall apart by week three? It’s rarely lack of ideas. It’s that the calendar was built to look impressive in a screenshot, not to survive a normal week of shifting priorities, half-finished drafts, and posts that need “just one more edit” before they go out.
Trello works well for content planning precisely because it doesn’t force you into someone else’s system. You build lists that match how content actually moves through your process idea, draft, review, scheduled, published and the board becomes a live snapshot of exactly where everything stands. No spreadsheet tabs, no guessing what “in progress” means today versus last week.
This walks through building one from nothing, with enough structure to stay organized and little enough overhead that you’ll still be using it in month three.
Why Spreadsheets and Docs Usually Fail for Content Planning

Most people start content planning in a spreadsheet or a shared doc. It works for about two weeks. Then columns get added inconsistently, statuses get typed differently by different people (“done” vs “Done” vs “posted”), and finding “what’s due this week” means scrolling and squinting at a wall of text.
A visual board fixes this by making status a position, not a label you have to type and re-type correctly. A card sitting in “Scheduled” tells you everything at a glance, no reading required.
The Core Board Structure
Here’s the list structure that covers most content workflows without over-engineering it:
| List Name | What Lives Here |
|---|---|
| Ideas | Raw topic ideas, not yet committed to |
| Drafting | Actively being written or created |
| In Review | Waiting on edits, feedback, or approval |
| Scheduled | Finalized, with a publish date set |
| Published | Live and done |
Every piece of content gets one card that moves left to right as it progresses. At any moment, scanning the board tells you exactly how much is in each stage, which is the single most useful thing a content calendar can do.
Building It Step by Step
Step 1: Create a New Board
- Open Trello and sign in to your account.
- Click Create in the top-right corner.
- Select Create Board.
- Name your board Content Calendar.
- Create the following lists in order:
- Ideas
- Drafting
- Review
- Scheduled
- Published


Why?
These lists represent the complete lifecycle of your content. As work progresses, you’ll simply move cards from one list to the next, making it easy to see the status of every project at a glance.
Step 2: Create a Card for Every Piece of Content
- Click Add a card under the Ideas list.
- Give the card a clear, descriptive title.
- Repeat this for every content idea you have.
Good Example
- Blog: 5 Budget Travel Tips
- YouTube: Beginner Photography Guide
- Newsletter: July Product Updates
Avoid
- Blog Post 1
- Video Idea
- Draft

Why?
Descriptive names make it much easier to find content later, especially once your board contains dozens of cards.
Step 3: Add Details to Each Card
- Open a card by clicking on it.
- In the Description section, include information such as:
- Content type
- Target keyword or topic
- Target platform
- Word count or content length
- Click Dates and assign a due date based on your planned publishing schedule.


Why?
Keeping all the important details inside the card means you won’t have to search through notes or documents later. Due dates also help Trello remind you when deadlines are approaching.
Step 4: Organize Content with Labels
- Open any content card.
- Click Labels.
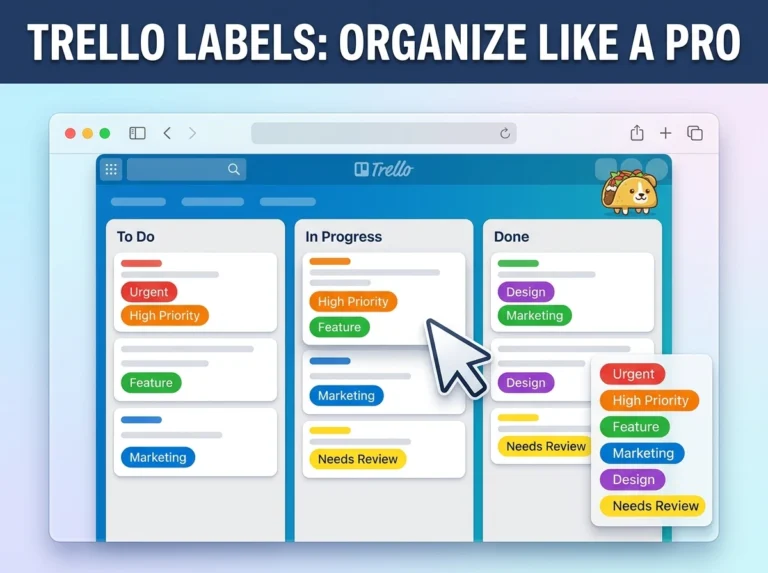
- Create color-coded labels for different content types.
For example:
- Blog Post
- Social Media
- YouTube Video
- Newsletter
- Guest Post
- Apply the appropriate label to each card.


Why?
Labels make it easy to filter your board and view only one type of content when planning a specific platform.
Step 5: Enable Calendar View
- Open your Trello board.
- Enable the Calendar view (available through Trello’s built-in views or workspace features, depending on your plan).
- Make sure every content card has a due date.


Why?
The calendar displays all scheduled content across the month, helping you identify publishing gaps, overlapping deadlines, or days with too much content planned.
Step 6: Move Cards as Work Progresses
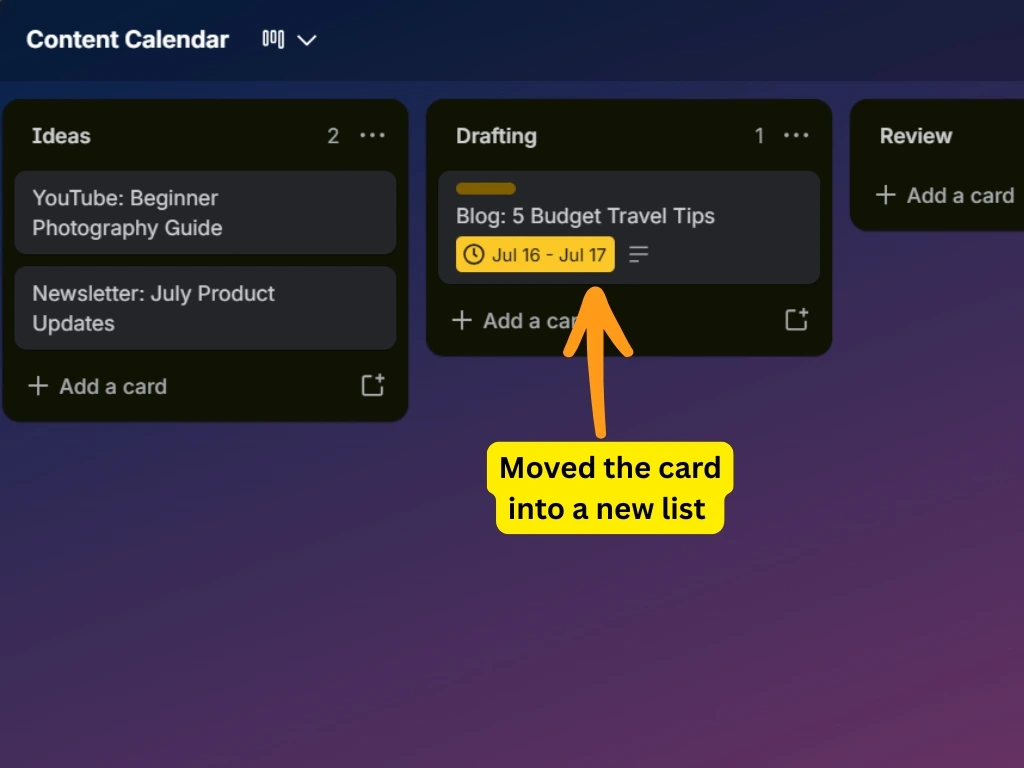
As you work on each piece of content, move the card to the appropriate list.
For example:
- Ideas → when it’s just a concept.
- Drafting → once you begin creating the content.
- Review → after the first draft is complete.
- Scheduled → when you’ve chosen a publication date.
- Published → after the content goes live.
You can move cards by dragging and dropping by using your mouse.
Why?
Keeping cards updated ensures your board accurately reflects the current status of every project. Moving cards consistently is what turns Trello into a reliable content management system rather than just another list of ideas.
Labels Worth Setting Up for a Content Board
| Label Color | Category |
|---|---|
| 🔵 Blue | Blog Post |
| 🟣 Purple | Social Media |
| 🟢 Green | Newsletter/Email |
| 🟡 Yellow | Video/Podcast |
| 🔴 Red | Urgent/Time-Sensitive |
Adjust categories to match your actual content mix. The goal isn’t to use every color, it’s to filter fast when you need to see one type of content in isolation.
Using Due Dates and Calendar View Together
Due dates alone tell you when something’s due. The Calendar Power-Up turns that into a visual month layout, which reveals patterns a list view hides, three blog posts all landing the same week, or a stretch of ten days with nothing scheduled at all. Catching that imbalance two weeks out is far easier to fix than noticing it the day before a content gap goes live.
Enable it under the “Power-Ups” menu on your board, search “Calendar,” and add it. It reads directly from your existing due dates, no separate setup required.
A Real Week on This Board
A freelance content writer managing blog work for two retainer clients set this exact structure up after months of losing track of drafts across scattered Google Docs links in Slack messages. Her Ideas list stayed loosely populated with topic angles pulled from client keyword research. Each Monday, she moved two or three cards into Drafting based on that week’s priorities, wrote directly against the due dates already visible on the cards, and used the Review list as a holding space while she waited on client feedback, instead of that feedback living buried in an email thread she’d have to search for later.
The card names themselves not a separate tracking document became her single source of truth for what she owed each client and by when. When a client asked for a status update, she didn’t need to check anything else. The board was the answer.
Content planning tips for freelancers — Content Marketing Institute
Common Mistakes That Undermine a Content Board
- Creating cards without due dates. A card with no date sits in “Drafting” indefinitely with no visible urgency, which is exactly how content quietly gets abandoned.
- Skipping the Ideas list and going straight to Drafting. Committing every idea to active work immediately means good ideas compete with each other for attention instead of sitting in a low-pressure holding space until they’re actually prioritized.
- Overloading card titles with detail instead of using the description. Long card titles make the board hard to scan. Keep titles short; put detail inside the card.
- Not moving cards consistently. A board that isn’t updated daily becomes fiction within a week, it stops reflecting what’s actually happening and people stop trusting it.
- Using too many labels with unclear meaning. More than six or seven categories starts adding visual noise instead of clarity.
- Never reviewing the Ideas backlog. Ideas pile up and go stale if nobody periodically checks whether they’re still relevant. A monthly glance keeps that list useful instead of becoming a graveyard.
Advanced Additions Once the Basics Are Working
Automation for recurring content. If you publish a weekly newsletter or recurring format, use Butler to auto-create a card each week in the Ideas list, removing the “did I remember to plan this week’s issue” mental overhead entirely.
A content brief template. Create a card, fill in your standard description fields (angle, keyword, format, audience), then save it as a card template so every new piece of content starts with the same structure instead of a blank field.
Filtering by platform for multi-channel planning. If you’re running blog, social, and newsletter content simultaneously, filter by label when planning one channel specifically, trying to plan all three at once from an unfiltered board gets visually overwhelming fast.
A “Repurposed From” note field. If content gets adapted across formats (a blog post becoming three social posts), a simple note linking back to the original keeps your repurposing pipeline traceable instead of scattered.
FAQs
- How many cards is too many for one content calendar board? There’s no strict limit, but once you’re managing more than 60–70 active cards, filtering by label or splitting into separate boards per channel becomes necessary for the board to stay scannable.
- Can I share this board with a client for their approval? Yes. add them as a board member with commenting access, or share individual cards for lighter-weight visibility without giving them edit access to the entire board.
- Does Trello work for a team managing multiple writers? Yes. Assign members to cards so ownership is clear, and use the “Filter by member” option so each writer can view just their own workload without the noise of everyone else’s cards.
- What’s the best way to plan recurring weekly content? Set up a Butler automation that creates a new card on a schedule, or duplicate a card template each week. Both remove the manual step of remembering to add it yourself.
- Should I track analytics or performance data on this board too? It’s possible using custom fields, but Trello isn’t built for deep analytics. Track performance in your analytics platform and only note high-level wins (like “top performer this month”) on the card itself if useful.
- How far in advance should a content calendar be planned? Two to four weeks of visibility is a practical sweet spot for most solo creators or small teams. Far enough ahead to catch gaps, not so far that priorities inevitably shift and you’re constantly reshuffling.
- Can I use this same structure for social media specifically instead of blog content? Yes, the same five-list structure works well, just adjust labels to reflect platforms (Instagram, LinkedIn, TikTok) instead of content types.
- What happens if a piece of content gets delayed past its due date? Trello flags overdue cards visually in red automatically. Rather than deleting the date, update it to the new realistic target, that keeps your Calendar view accurate rather than quietly wrong.
- Is the free version of Trello enough to run a full content calendar? Yes, for most individuals and small teams. The Calendar Power-Up and basic automation are both available on the free plan, covering everything in this guide without a paid upgrade. Trello pricing page
- How do I stop the Ideas list from becoming a dumping ground nobody reviews? Set a recurring monthly reminder (a Butler-created card works well for this) to skim the Ideas list, archive anything no longer relevant, and pull forward anything worth prioritizing.
Where to Start
A content calendar only works if it survives contact with a real week, deadlines shifting, feedback arriving late, ideas changing priority halfway through. The five-list structure here is deliberately plain because plain things are what actually get maintained.
Build the board today. Add whatever content you already have planned as cards, even roughly. Move one card forward before you close the tab. That’s the whole system starting to work not a perfect calendar, just an accurate one.