
Have you ever shared a Notion page and then felt that small moment of panic?
“What if they edit something… or worse, delete it?”
This happens more often than people admit. One wrong permission setting, and suddenly your clean notes, client docs, or student resources get messed up.
The good news?
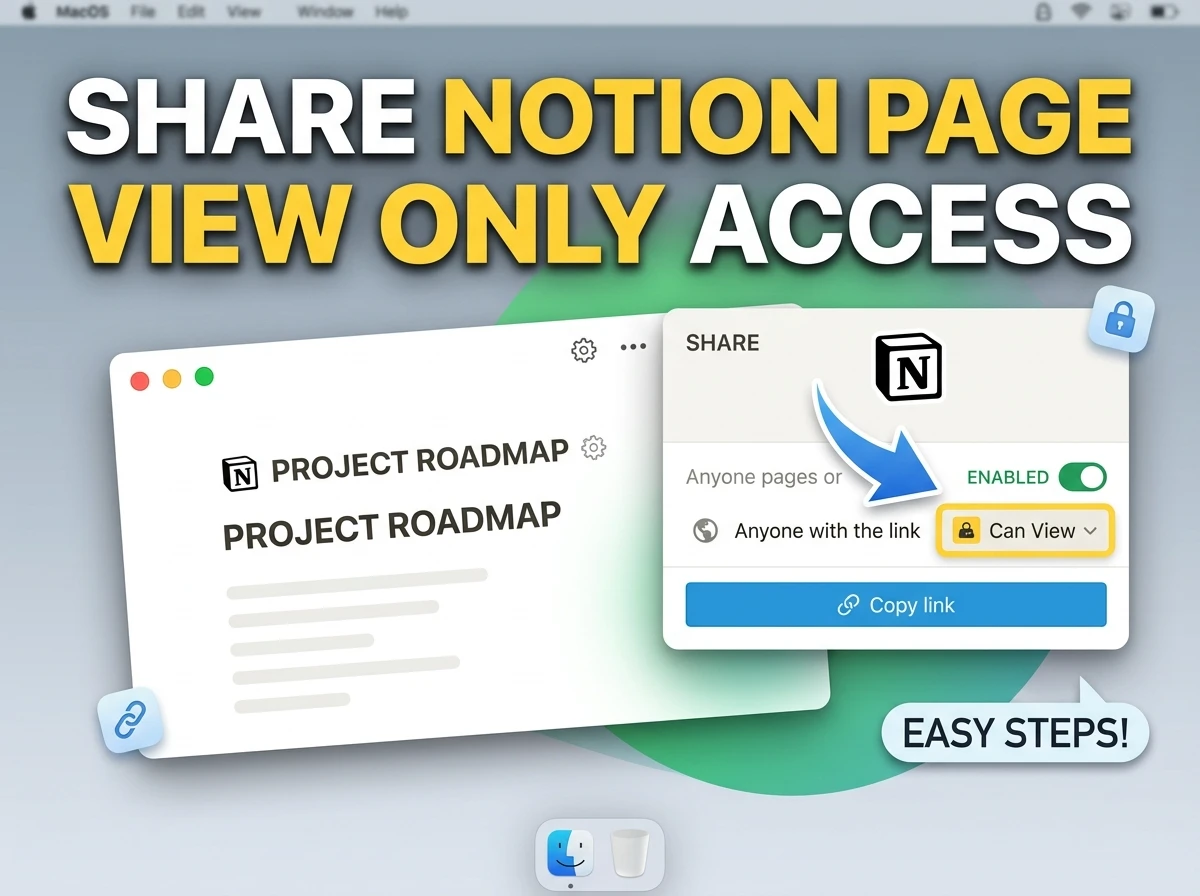
Notion gives you a simple way to share your page safely without allowing edits.
In this guide, you’ll learn exactly how to share a Notion page with view only access, where to click, what to avoid, and how to make it look professional.
What Is View Only Access in Notion?
View only access means:
- People can read your page
- They cannot edit, delete, or change anything
Think of it like sending a PDF instead of a Word document.
They can see everything, but your original stays untouched.
This is perfect for:
- Students sharing notes
- Freelancers sending documentation
- Teams sharing internal guides
- Creators sharing templates
Why View Only Access Matters (Real Reason Most People Ignore)
Most people think this is just about safety.
But it’s actually about control and professionalism.
When you use view only:
- Your content stays clean
- No accidental edits
- No broken formatting
- Better client/student experience
One small mistake in permissions can destroy hours of work.
Quick Checklist
Before we go step by step, here’s the fast version:
- Open your Notion page
- Click Share (top right)
- Enable Share to web or invite email
- Set permission to Can View
- Copy link
- Test in incognito
Step by Step: How to Share a Notion Page with View Only Access
Step 1: Open Your Notion Page
Go to the page you want to share.
Make sure it’s clean and ready (no unfinished notes).
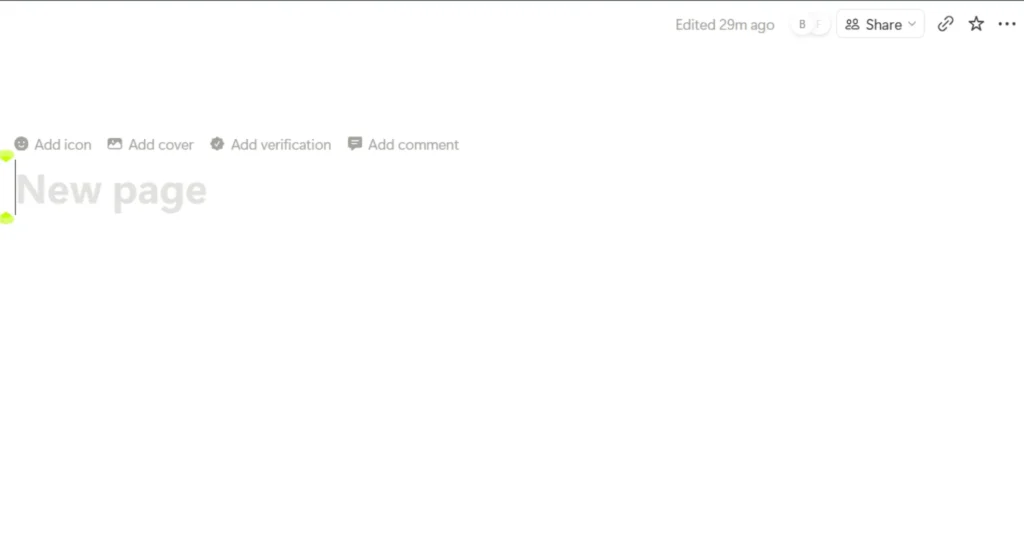
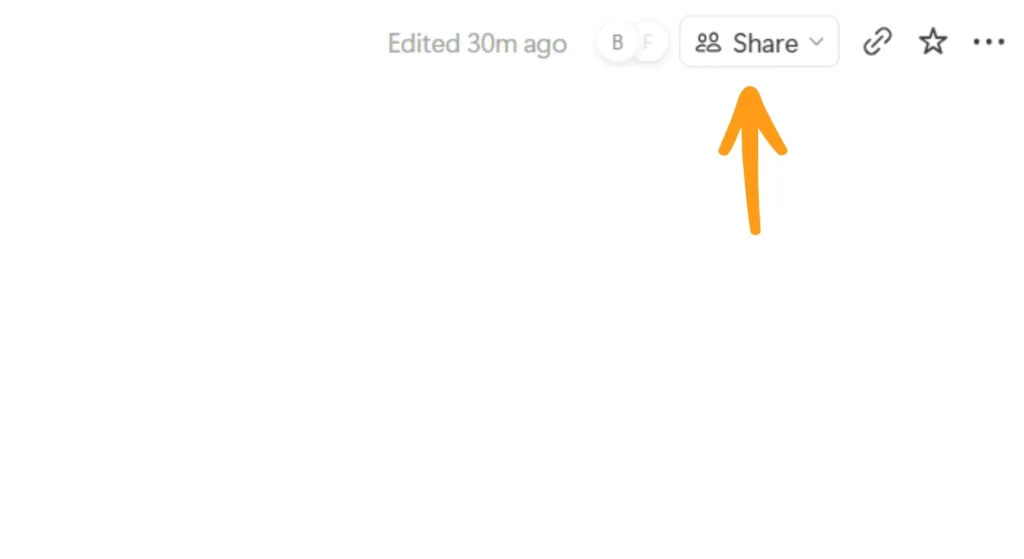
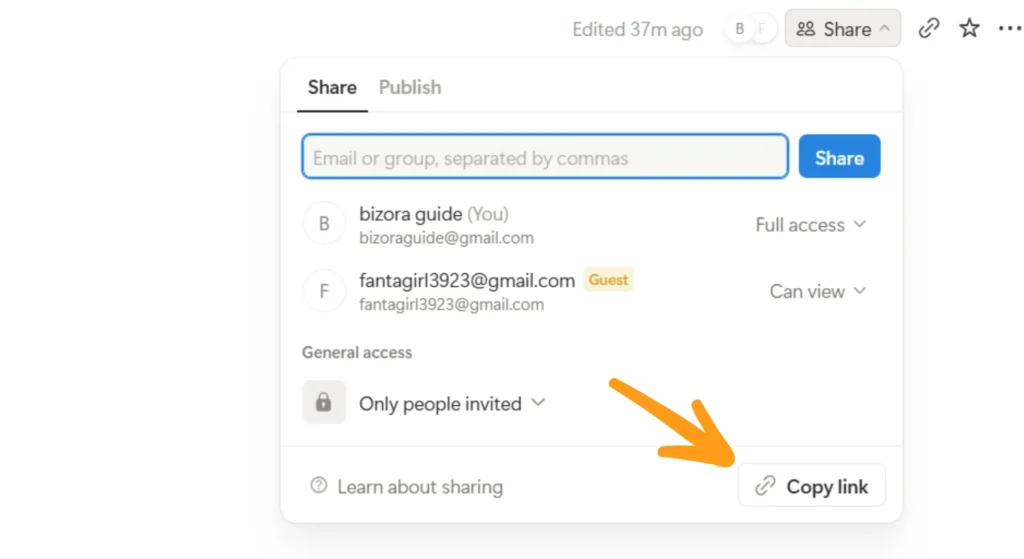
Step 2: Click the “Share” Button
Look at the top right corner.
Click the Share button.
Step 3: Enable Sharing
You have 2 options:
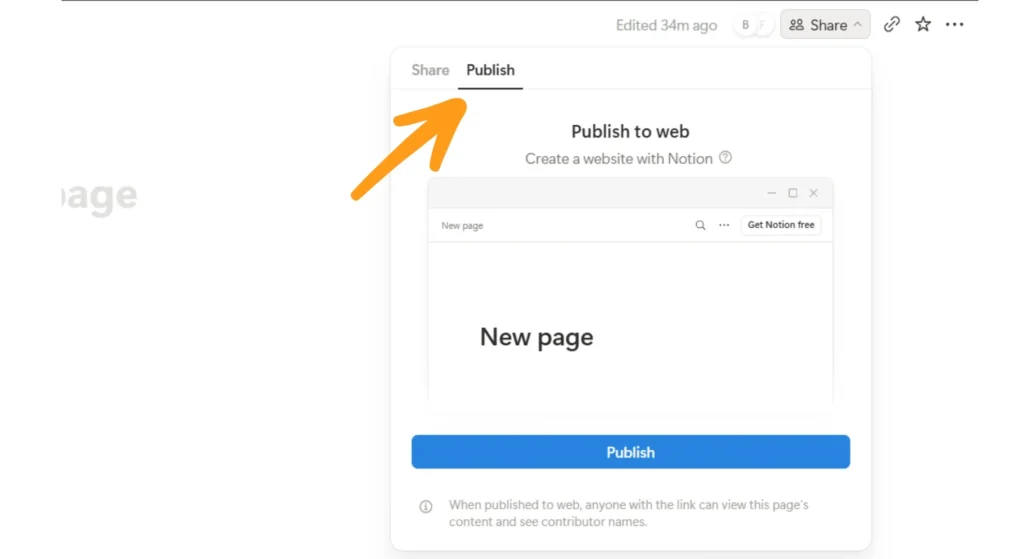
Option A: Share with Link (Public Access)
- Turn ON “Share to web”
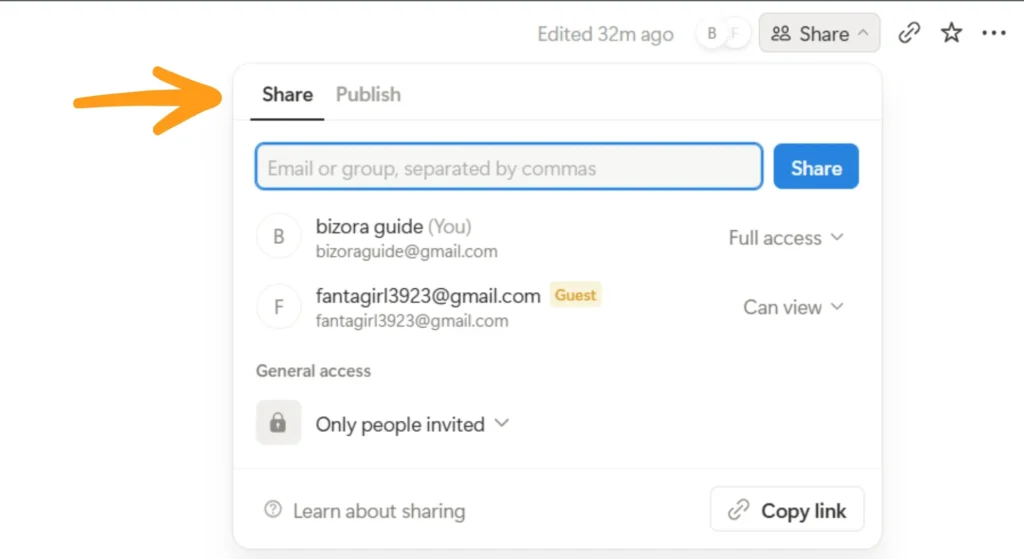
Option B: Share with Specific People
- Enter email addresses
Step 4: Set Permission to “Can View”
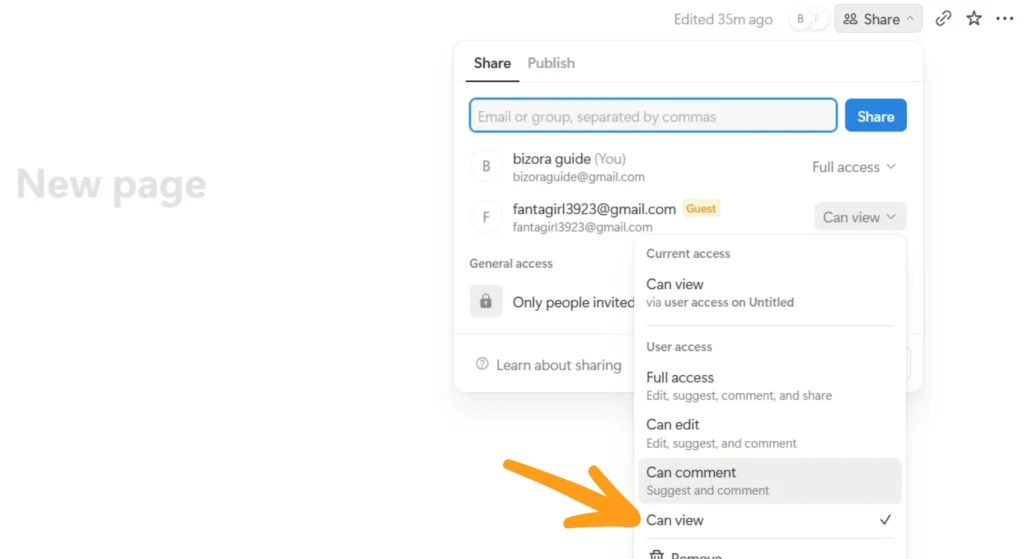
This is where most people mess up.
Make sure permission is set to:
👉 Can View
NOT:
- Can Edit ❌
- Can Comment ❌ (unless needed)
Step 5: Copy the Link
Click Copy Link and send it.
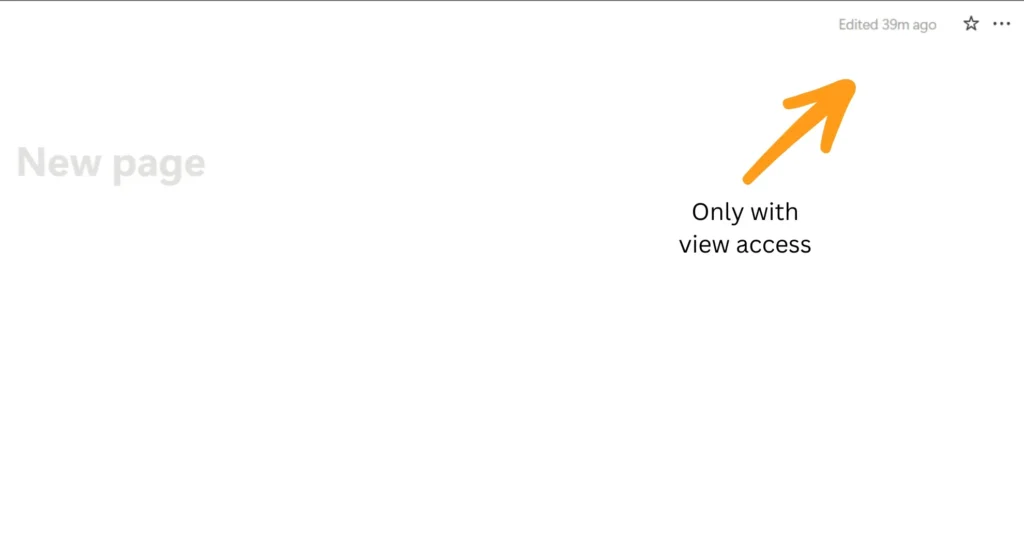
Step 6: Test Before Sending
Open:
- Incognito window
- Paste the link
Check:
- Can you edit? (should be NO)
- Does it look clean?
Permission Types Explained
Most beginners get confused here.
Can View
- Read only
- No edits
Can Comment
- Can add comments
- Cannot change content
Can Edit
- Full access (dangerous if shared wrongly)
Always double-check before sharing.
Practical Use Case
Let’s say you’re a freelance web designer.
Instead of sending messy files, you create one Notion page:
- Project details
- Login credentials
- Instructions
- FAQs
Then you share it with view-only access.
Your client:
- Sees everything clearly
- Cannot break anything
That’s a professional delivery system.
Common Mistakes to Avoid
These mistakes cost time and trust.
1. Forgetting to Change Permissions
The default might allow editing.
2. Sharing the Wrong Page
Always double-check before sending.
3. Not Testing the Link
Big mistake. Always test.
4. Leaving “Duplicate as Template” ON
People may copy your content without intention.
5. Sharing Private Information Publicly
Be careful with:
- Passwords
- Personal data
6. Overcomplicated Page Layout
Messy page = bad user experience
7. Not Updating Permissions Later
Remove access when no longer needed.
Pro Tips
These small things make a BIG difference.
1. Create a Clean “Public Version”
Don’t share your working page. Duplicate it and clean it.
2. Disable Editing + Duplicate Option
Go to settings and turn OFF duplication if needed.
3. Use Headings + Structure
Make your page easy to read.
4. Add Navigation Links
Helps users move quickly inside long pages.
5. Keep It Minimal
Simple pages perform better.
Bonus: Combine This With a Habit Tracker
Here’s a smart idea most people don’t use.
You can create a Notion Habit Tracker and share it with:
- Students
- Clients
- Followers
Using view-only access, you can:
- Showcase your system
- Share templates
- Build authority
This turns a simple page into a value asset.
FAQs
1. Can someone edit a Notion page with view-only access?
No. They can only read it.
2. Can viewers comment on the page?
Only if you enable comment access.
3. Can I change permissions later?
Yes. Anytime.
4. How do I stop sharing a page?
Turn off “Share to web” or remove access.
5. Does it work on mobile?
Yes. Same permissions apply.
6. Can anyone with the link see my page?
Only if link sharing is enabled.
7. Will updates show automatically?
Yes. Viewers see the latest version.
8. Can viewers duplicate my page?
Sometimes. Disable if needed.
9. Is view-only fully secure?
For editing, yes. But avoid sharing sensitive data publicly.
10. What’s better: Notion or PDF sharing?
Notion is better for live updates and structured content.
Conclusion
Sharing a Notion page with view only access is simple, but doing it correctly makes a huge difference.
It protects your work.
It improves your presentation.
It saves you from unnecessary problems.
Before sharing anything:
- Check permissions
- Test the link
- Keep it clean
Start using view only sharing properly, and you’ll instantly look more organized, professional, and reliable.
External Resources
- Notion Help Center – Sharing & Permissions
- Notion Help Center – Publish to Web