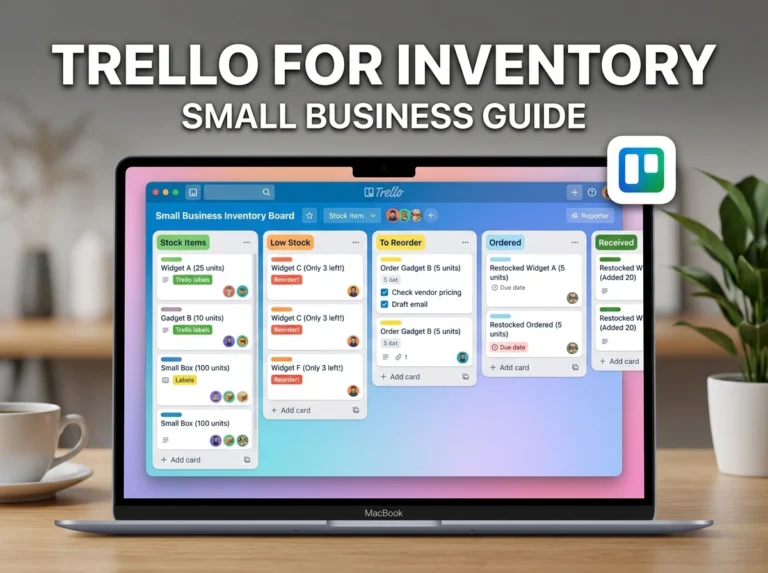
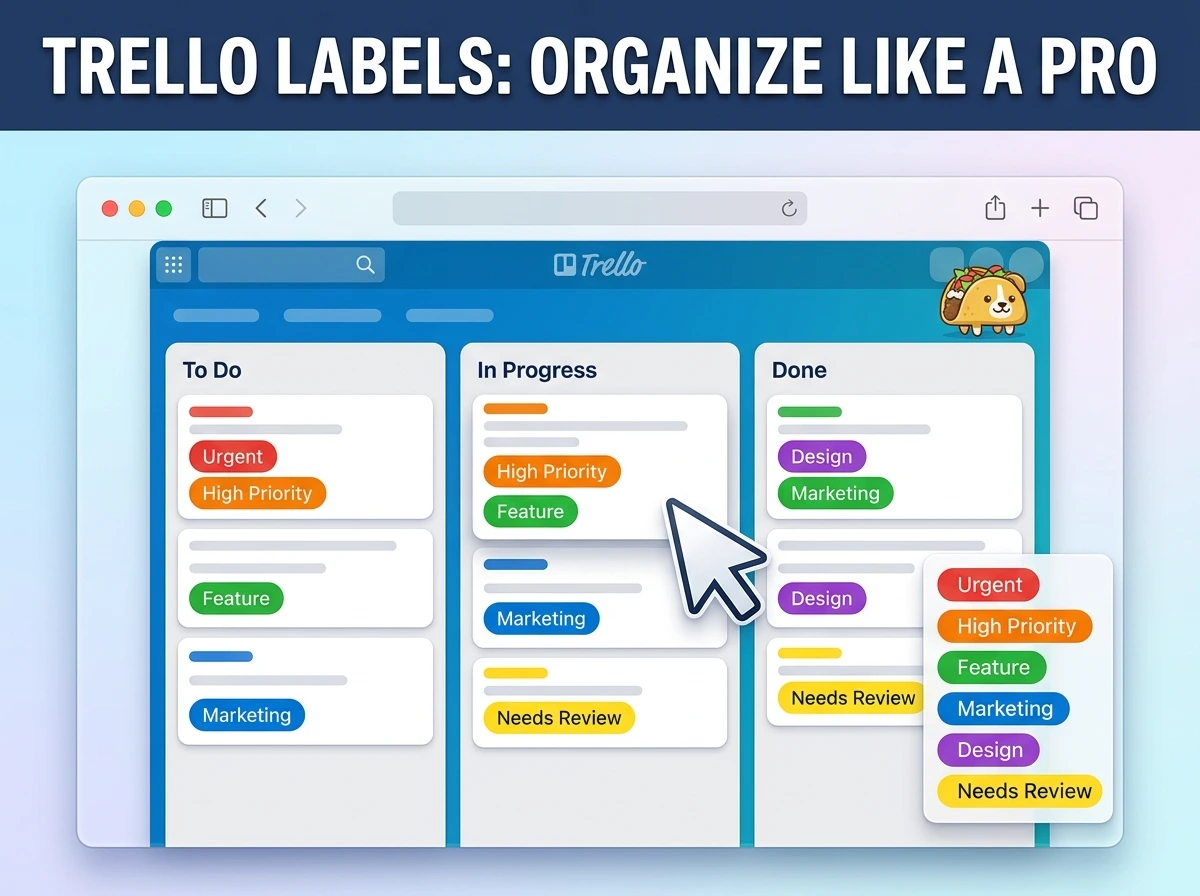

If you’ve been using Trello for a while, there’s a good chance your board looks something like this: a pile of cards across several lists, some overdue, some vague, and absolutely no way to tell at a glance what’s urgent, what’s blocked, and what’s someone else’s problem. Sound familiar?
Most Trello users set up their board, create a few lists, and stop there. They treat labels like an optional decoration, a splash of color with no real logic behind it. And then they wonder why their “organized” board still feels chaotic.
Labels, when used with intention, are one of the most underrated features in Trello. They turn a cluttered board into a visual system that tells you exactly what’s happening across your entire project in under 10 seconds. This guide shows you how to actually use them, not just what they are.
What Trello Labels Actually Are (And What Most People Get Wrong)
Trello labels are color-coded tags you attach to cards. Each label can have a color, a custom name, or both. They’re visible directly on the card face in board view, which means they communicate information without anyone having to open a single card.
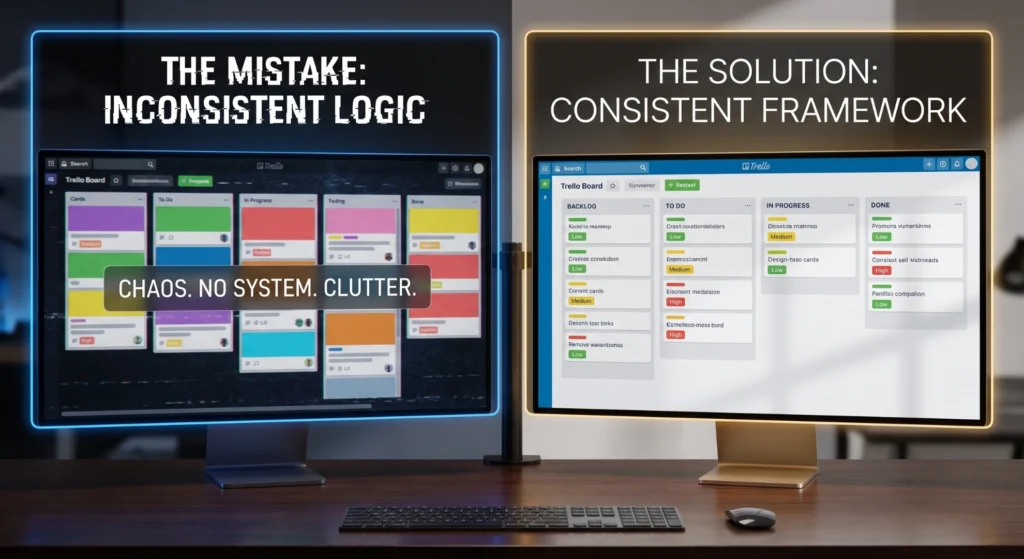
Here’s where most people go wrong: they use labels as vague categories with no consistent logic. One person adds a red label meaning “urgent,” another uses the same red to mean “design task,” and within a week, nobody trusts the labels at all.
The fix is simple, decide what your labels mean before you start applying them, and stick to it. A label system that three people interpret three different ways is worse than no system at all.
Why Labels Matter More Than You Think
Think of your Trello board as a wall of information. Without labels, every card looks identical until you open it. With a well-designed label system, you can:
- Spot all blocked tasks at a glance without clicking anything
- Filter the board to show only your tasks in a shared team project
- Identify priority levels instantly across hundreds of cards
- Track task types (design, development, content) without separate boards
That last point is huge. Labels let one board do the work of three, which means less jumping between workspaces and more time actually working.
Trello Labels vs. Other Trello Organization Features
Before diving into setup, it helps to understand where labels fit alongside Trello’s other tools, because labels aren’t the right solution for every organizational need.
| Feature | Best Used For | Works With Labels? | Limitation |
|---|---|---|---|
| Labels | Task type, priority, status, ownership | — | Visual only — can’t trigger automations alone |
| Due Dates | Deadlines and scheduling | Yes | Doesn’t show category or type |
| Members | Assigning ownership | Yes | Doesn’t show task context |
| Checklists | Sub-tasks within a card | Yes | Internal only — not visible on card face |
| Lists | Workflow stages (To Do → Done) | Yes | Can’t show multiple statuses at once |
| Custom Fields (paid) | Structured data (budget, status, etc.) | Yes | Free plan has limits |
| Power-Ups | Integrations (Calendar, Slack, etc.) | Yes | Depends on plan |
Labels sit in a sweet spot, they’re visible on the card face, flexible in meaning, and available on the free plan. That makes them the most accessible organizational tool Trello offers, if you use them with a clear system.
How to Set Up Trello Labels: Step-by-Step
Step 1: Access Label Settings
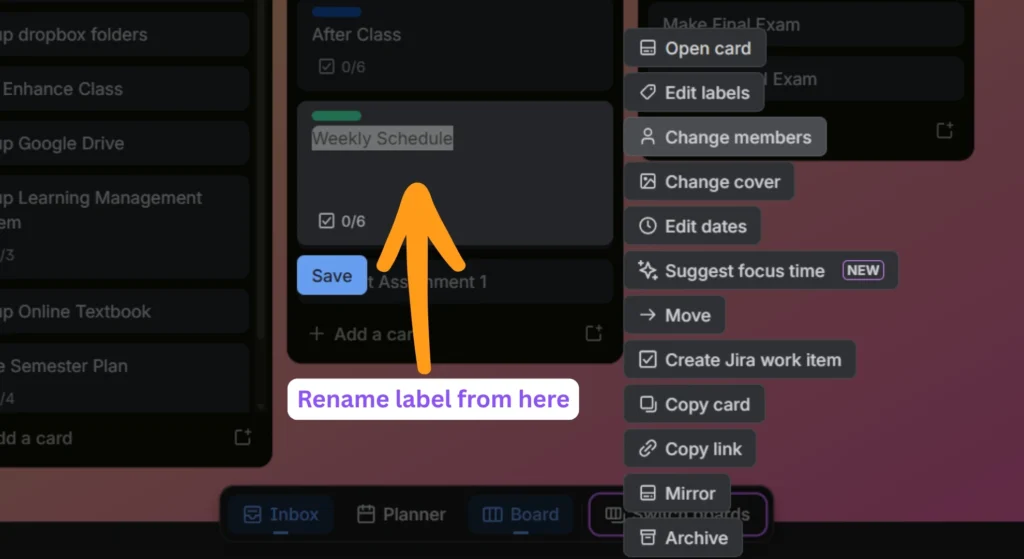
Open your Trello board. Click any card, then click “Labels” in the right-hand sidebar. Alternatively, hover over any card on the board and press the keyboard shortcut “L”, the label menu opens instantly. At the top of that menu, click the pencil icon to edit label names.
First do this
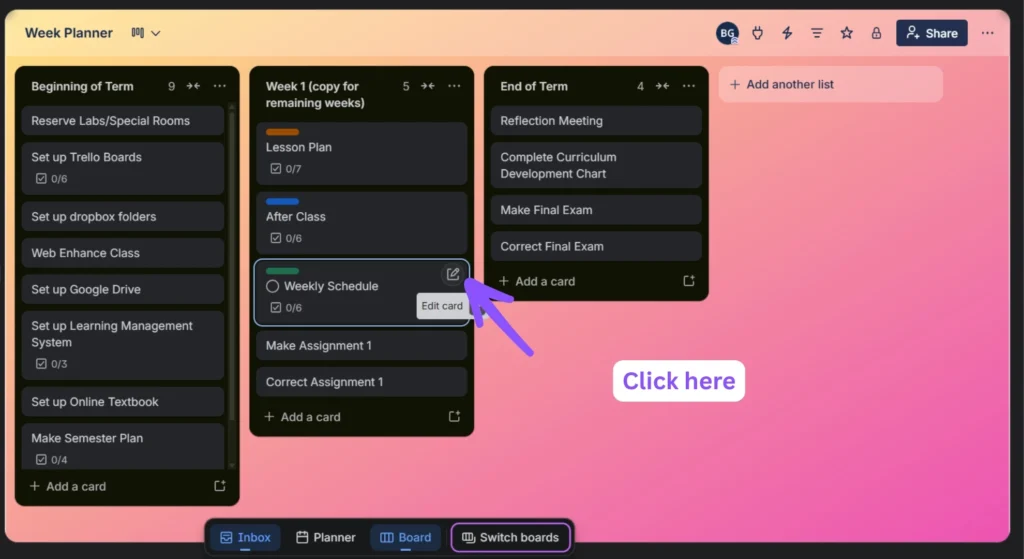
Below is the label menu
Step 2: Choose a Label Framework First
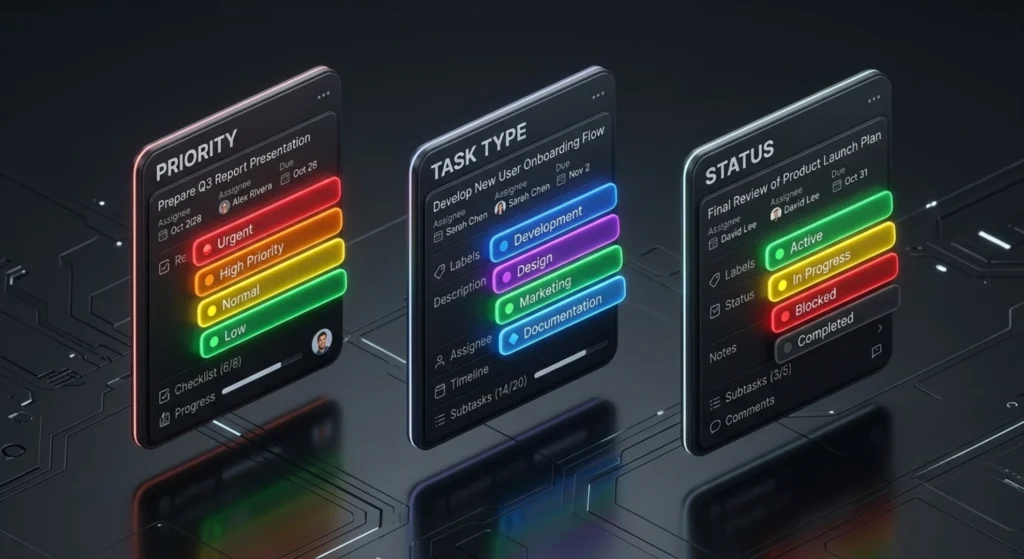
Don’t start naming labels yet, decide your framework. The three most effective label frameworks are:
Priority-Based — labels represent urgency levels Type-Based — labels represent task categories Status-Based — labels represent where a task stands
You can also combine two frameworks using dual labels (one for priority, one for type) more on that in the Pro Tips section.
Phase 1: Access the Label Menu
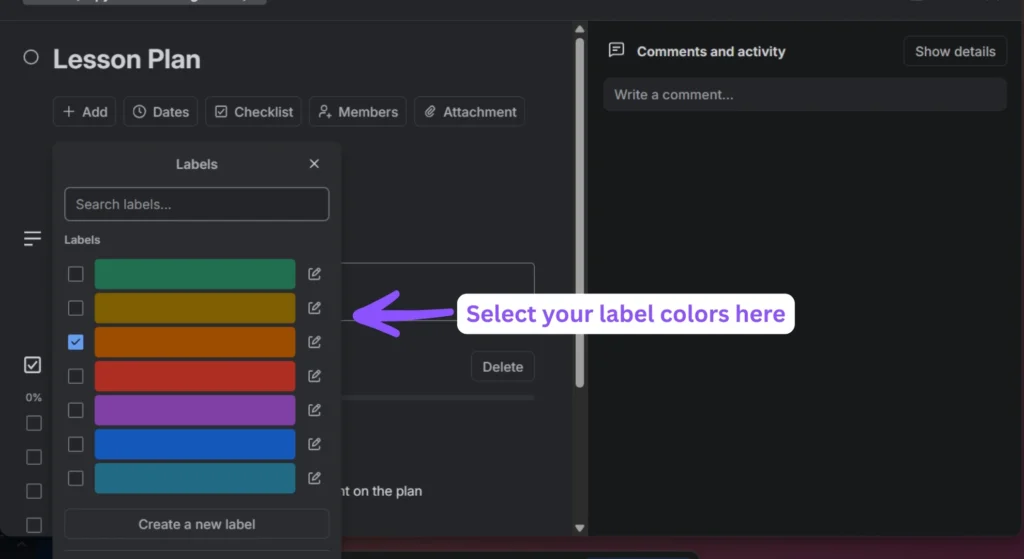
- Click any task card on your Trello board.
- Click Labels on the right sidebar.
- Click the pencil icon next to a color to edit.
Phase 2: Execute Your Framework
Type your category name and click Save. Choose only one core system to prevent workflow chaos:
- Priority-Based: Red (Urgent), Yellow (High), Green (Low).
- Type-Based: Blue (Editorial), Purple (Technical), Orange (Social).
- Status-Based: Lime (Ready), Pink (Review), Black (Approved).
Phase 3: The Dual-Label Rule
If combining frameworks (e.g., Priority + Type), strictly divide your color palette for instant visual scanning:
- Warm Colors (Red, Yellow, Orange): Priority levels only.
- Cool Colors (Blue, Green, Purple): Task types only.
Step 3: Name Your Labels With Purpose
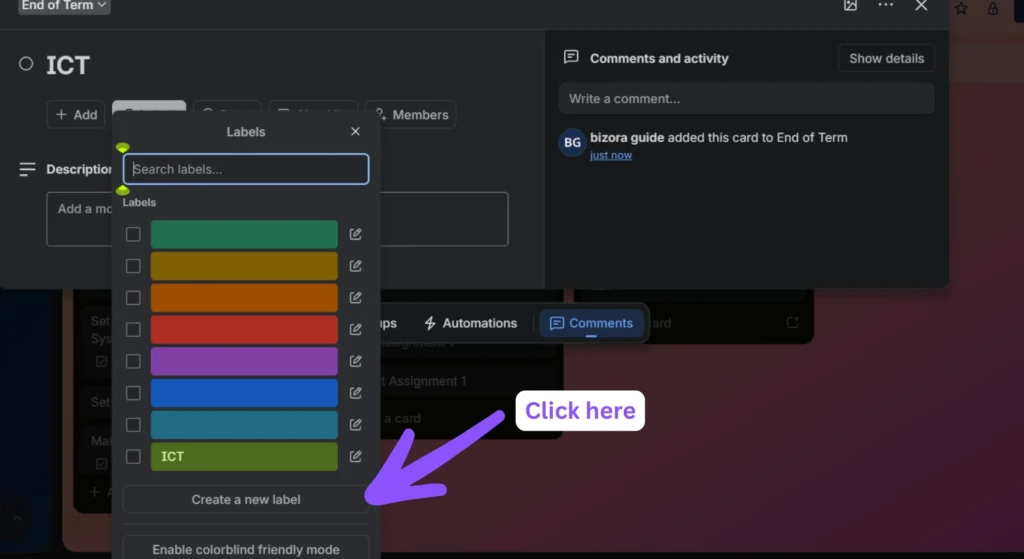
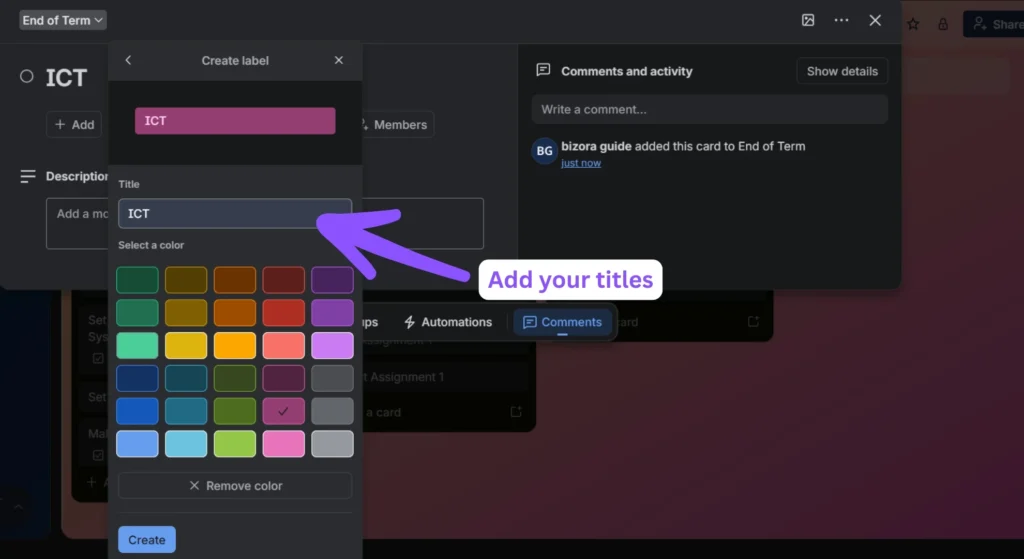
Trello gives you up to 10 colors per board. Name every label you plan to use. Unnamed color labels are almost always ignored or misapplied within days.
First do this
Then name your labels as below
Step 4: Apply Labels Consistently
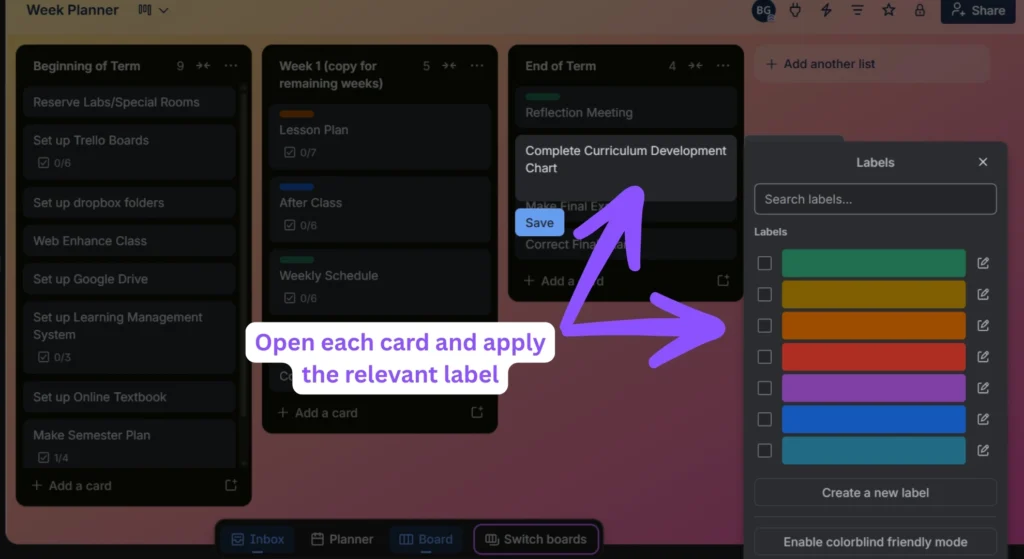
Open each card and apply the relevant label. For new cards going forward, make label application part of your card creation routine, not an afterthought.
Step 5: Filter by Label to Use Them Properly
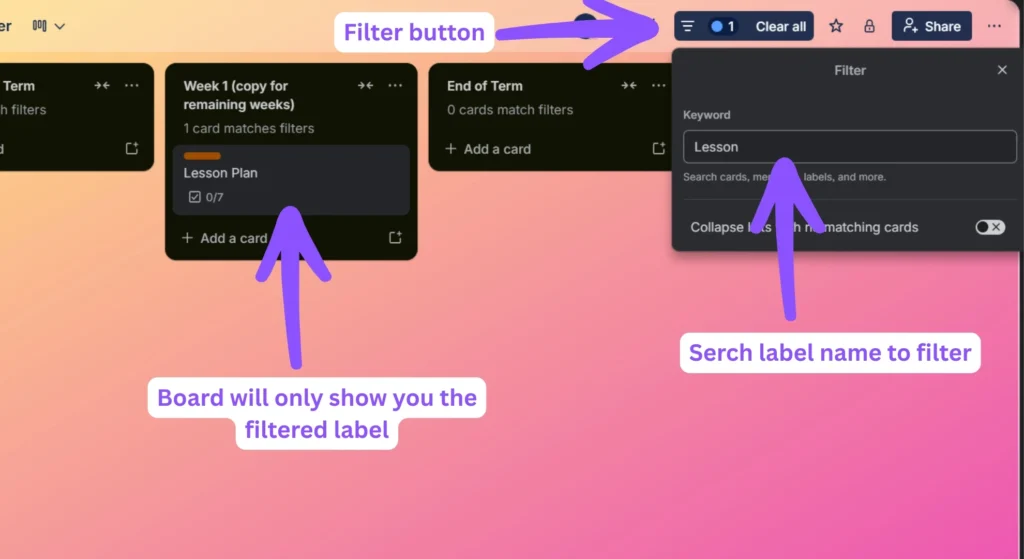
Click “Filter” at the top right of your board (or press “F”), then select a label. The board will instantly hide every card that doesn’t carry that label. This is where the real payoff happens.
The 3 Most Effective Label Frameworks (With Examples)
Framework 1: Priority Labels
Simple, clean, and effective for solo users or small teams.
| Label Color | Label Name | Meaning |
|---|---|---|
| 🔴 Red | Urgent | Needs attention today |
| 🟠 Orange | High Priority | This week’s focus |
| 🟡 Yellow | Normal | Standard timeline |
| 🟢 Green | Low Priority | Do when time allows |
| ⚫ Dark | On Hold | Paused — waiting on something |
Best for: Freelancers, solo entrepreneurs, anyone managing personal projects.
Framework 2: Task Type Labels
Great for teams where different people handle different kinds of work.
| Label Color | Label Name | Meaning |
|---|---|---|
| 🔵 Blue | Design | UI, graphics, visual work |
| 🟣 Purple | Development | Coding, technical tasks |
| 🟢 Green | Content | Writing, copy, scripts |
| 🟡 Yellow | Research | Discovery, analysis |
| 🔴 Red | Client-Facing | Deliverables or communications |
| ⚪ Sky | Admin | Internal ops, documentation |
Best for: Creative agencies, marketing teams, freelancers managing multiple service types.
Framework 3: Status Labels
Works brilliantly alongside Trello’s list-based workflow, adding a layer of context that lists alone can’t show.
| Label Color | Label Name | Meaning |
|---|---|---|
| 🟢 Green | In Progress | Actively being worked on |
| 🟡 Yellow | Needs Review | Waiting for feedback |
| 🔴 Red | Blocked | Can’t move forward without input |
| 🟣 Purple | Waiting on Client | Ball is in their court |
| ⚫ Dark | Deprioritized | Pushed back intentionally |
Best for: Project managers, remote teams, client service workflows.
Practical Use Case: How a Marketing Team Overhauled Their Trello Board
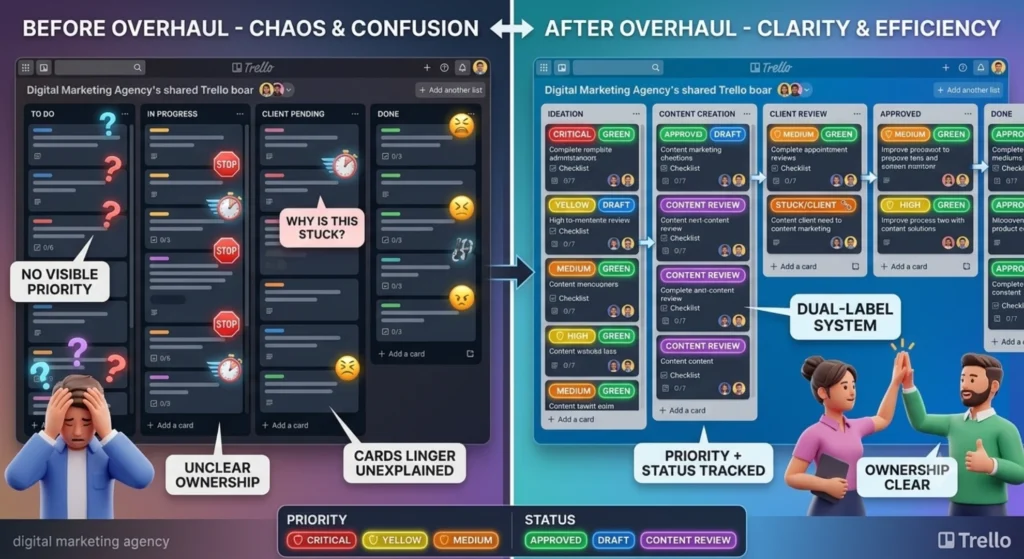
Meet the content team at a small digital agency; four people, one shared Trello board, and a constant problem: nobody could tell what was urgent, who owned what, or which cards were stuck waiting for client approval. Cards sat in “In Progress” for days with no visible reason why.
Here’s what their board looked like before and after implementing a dual-label system (Priority + Status):
| Problem Area | Before Labels | After Labels | Result |
|---|---|---|---|
| Identifying blocked tasks | Had to open every card | Filtered by 🔴 Blocked label | Found 6 blocked tasks in 10 seconds |
| Morning standup prep | 15 min of board scanning | 3 min filter by 🔴 Urgent | Standups cut from 20 min to 8 min |
| Client deliverable tracking | Mixed in with internal tasks | 🔴 Client-Facing label filter | Separated instantly |
| New team member onboarding | Confusing board, no visual logic | Color system explained in 5 min | Up to speed same day |
| Weekly priority check | Manual card-by-card review | Filter by High Priority label | Done in under 4 minutes |
The team didn’t change their workflow, add new lists, or buy a paid plan. They just added a consistent label system and trained themselves to apply it every time a card was created.
Combining Labels for a More Powerful System
Once you’re comfortable with one framework, you can stack two label types on a single card, one for priority, one for type. This sounds complex but looks clean in practice.
A card might have:
- 🔴 Urgent + 🔵 Design — high-priority visual work
- 🟡 Normal + 🟣 Development — standard coding task
- ⚫ On Hold + 🟢 Content — writing task that’s paused
When you filter by “Design,” you see all design tasks. Filter by “Urgent” and you see only what needs immediate attention. Filter both simultaneously, and you get urgent design tasks only. That’s a three-dimensional view of your project from a free feature inside a free plan.
Mistakes to Avoid
- Using colors with no names — a red label means nothing if three people assume it means three different things. Always name every label you use.
- Creating too many labels — 10+ labels on one board creates visual noise. Stick to 5–7 maximum. If you need more, reconsider your framework or split into two boards.
- Changing label meanings mid-project — if “Yellow” means “In Review” in week one and “Low Priority” in week three, your historical cards become misleading. Define meanings before you start.
- Not filtering regularly — labels only save time if you use the filter. If your team isn’t filtering by label at least weekly, the system decays into decoration.
- Applying labels inconsistently — one team member who skips labels breaks the whole visual system for everyone. Make label application a non-negotiable part of card creation.
- Using labels to replace lists — labels and lists do different jobs. Lists show workflow stage. Labels show context and characteristics. Don’t try to make labels do both — it creates confusion fast.
- Never reviewing and updating your label system — as projects evolve, some labels become obsolete and new needs emerge. A 15-minute quarterly label audit keeps your system relevant.
How to Create a Trello Board for Daily Tasks in 10 Minutes
Pro Tips
- Use Trello’s keyboard shortcut for speed. Hover over any card and press the number keys 1–9 to toggle labels on and off without opening the card. Once memorized, labeling becomes a two-second action.
- Color-blind accessibility matters. Trello added label name display directly on cards for this reason, always name your labels, not just color them. Your board should be readable without color perception.
- Use label filtering during team meetings. Share your screen, filter by “Blocked” or “Needs Review,” and run through only those cards. Meetings get dramatically shorter when you’re not scrolling through the entire board.
- Pair labels with Trello Automations (Butler). On Trello’s free plan, Butler allows basic automations, like automatically adding a “Needs Review” label when a card is moved to the “Done” list. This removes the human step of remembering to label.
- Create a Labels Legend card. Pin a card at the top of your first list titled “📌 How We Use This Board” that lists every label, its color, and its exact meaning. New team members understand your system in 60 seconds flat.
- Archive, don’t delete old labels. If a label becomes irrelevant, remove it from new cards but don’t delete it from the board, historical cards still carry it, and deleting removes all visual context from past work.
FAQs
1. How many labels should I use on a Trello board? Five to seven is the sweet spot for most projects. Fewer than five often doesn’t provide enough granularity. More than eight starts creating visual noise that defeats the purpose of having labels at all.
2. Can I use multiple labels on one card? Yes, and you should when it makes sense. A card can carry a priority label and a task-type label simultaneously. Just avoid stacking so many labels on one card that the card face becomes unreadable.
3. Are Trello labels available on the free plan? Yes, fully. Labels are a core Trello feature available on every plan, including free. The only label-related limitation on the free plan is that custom fields (a separate feature) are restricted.
4. Can I filter by multiple labels at once? Yes. Trello’s filter function lets you select multiple labels simultaneously. When you choose two labels, it shows cards that carry either label, useful for seeing all high-priority work regardless of task type.
5. What’s the difference between Trello labels and lists? Lists represent stages in your workflow, where a task is in the process (To Do, In Progress, Done). Labels represent characteristics of the task, what type it is, how urgent it is, or what its current status is. Both work together, not instead of each other.
6. How do I make sure my whole team uses labels consistently? Create a shared “board guide” card that defines every label. Include it in onboarding for new team members and review it briefly in your first team meeting. Consistency comes from clarity, not enforcement.
7. Can I copy my label system to a new board? Not automatically on the free plan. However, you can copy a board (including its labels) as a template using Trello’s “Copy Board” feature. This saves your entire label setup and reuses it for every new project.
8. What if a card doesn’t fit any of my existing labels? That’s a useful signal, either the card is genuinely unique (add a new label if this type will recur) or your label framework needs a slight adjustment. Don’t force a card into a label that doesn’t fit just to keep the system tidy.
9. Should personal Trello boards use the same label system as team boards? Not necessarily. Personal boards can use simpler systems often just priority labels are enough when you’re the only one reading them. Team boards benefit from more structured, named systems because interpretation needs to be shared.
10. How often should I review and update my label system? A quick label audit every 4–6 weeks works well for active projects. Check whether all labels are still being used, whether any meanings have drifted, and whether any new task types have emerged that need their own label.
Final Thoughts
Trello labels aren’t a feature you set up once and forget, they’re a visual language your entire board speaks. And like any language, they only work when everyone agrees on what the words mean.
The difference between a chaotic Trello board and a clear one often isn’t the number of lists or the fanciness of the power-ups. It’s whether someone took 20 minutes to define a label system, explained it to the team, and made it a consistent habit.
Pick one framework from this guide- priority, type, or status. Set it up today. Apply it to your existing cards this week. Then filter your board by a single label and watch 80% of your project’s current status become instantly visible.
That’s the power of labels. Not the colors, the clarity behind them.