

A question worth asking before building anything: how many times this month have you had to dig through old emails just to remember what you agreed to with a client three weeks ago? For most freelancers and small service businesses, the answer is uncomfortably high and it’s rarely because they weren’t paying attention. It’s because the information was never centralized in the first place.
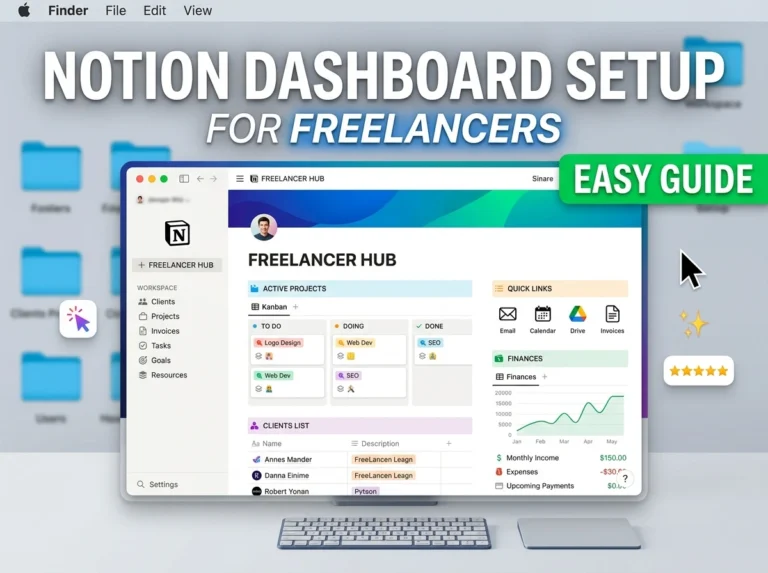
A Notion client dashboard fixes this by giving every client one home, their contact details, project status, communication history, and financials all connected in one place. Not a beautifully designed showcase page. A working reference you actually open before every client call instead of scrambling through old threads beforehand.
This walks through building one from scratch, with just enough structure to stay useful without becoming its own time-consuming project to maintain.
What a Client Dashboard Needs to Actually Do
Before opening Notion, it’s worth being clear-eyed about the job this page has to do. A functional client dashboard answers three things instantly:
- Who is this client, and what’s the current state of the relationship?
- What are we working on together right now, and what’s the status?
- What’s been paid, what’s owed, and what did we agree to?
If you can’t answer those three questions in under 15 seconds by opening a client’s page, the dashboard isn’t doing its job yet, regardless of how it looks.
Step-by-Step: How to Create a Notion Client Dashboard
Even if you’ve never built a database in Notion before, don’t worry. Follow these steps one by one, and you’ll have a functional client dashboard in less than an hour.
Step 1: Create a New Page
Open your Notion workspace and click + New Page from the left sidebar.
Name your page:
Client Dashboard
Choose a blank page so you can build everything from scratch.

Step 2: Create the Master Client Database
Inside your new page, type:
/tableSelect Table – Full Page or Table – Inline.
This will become the main database where every client is stored.
Rename the table to:
Clients

Step 3: Add Client Properties
Now create the columns your dashboard needs.
| Property | Type |
|---|---|
| Client Name | Title |
| Status | Select |
| Industry | Select |
| Contact Email | |
| Phone Number | Phone |
| Project Value | Number |
| Relationship Start | Date |
| Next Action | Text |
These properties give you a quick overview without opening each client’s page.


Step 4: Create Status Options
Click the Status property and create options like:
- Prospect
- Active
- Waiting
- Completed
- Archived
Using colors makes the dashboard easier to scan.

Click Add an option button and then add the properties given and hit enter. The final output should looks like below.

Step 5: Create a Client Page Template
Every row in your database is actually its own Notion page.
Click the arrow beside New and choose New Template.

It will looks like this

Scroll down and Build a reusable layout like this, by adding below data.
Contact Information
- Name
- Phone
- Company
Project Details
- Current projects
- Deadlines
- Priority
Meeting Notes
- Date
- Discussion
- Decisions
Communication Log
- Emails
- Calls
- Messages
Invoices & Payments
- Invoice number
- Amount
- Payment status
Now every new client automatically gets this structure.

Step 6: Create a Projects Database
Create another page called:
Projects
Add these properties:
| Property | Type |
|---|---|
| Project Name | Title |
| Client | Relation |
| Status | Select |
| Deadline | Date |
| Priority | Select |
Instead of writing client names manually, connect them using a Relation property.

Step 7: Link Clients and Projects
Inside the Projects database:
Click Add Property → Relation
Choose the Clients database.
Now every project belongs to a specific client.
Open any client page, and you’ll automatically see all related projects.
First follow these steps

Then it should see like this

Step 8: Create an Income or Invoice Database (Optional)
If you invoice clients regularly, create another database called:
Invoices
Recommended properties:
- Invoice Number
- Client
- Amount
- Due Date
- Status
- Payment Date
Connect this database to Clients using another Relation property.
Step 9: Build Your Dashboard
Step 9.1 Return to the Client Dashboard Page
Click Client Dashboard in the left sidebar.
You should see the main page where you originally created your Clients database.
Step 9.2 Add a Dashboard Title
If your page doesn’t already have one, type:
# Client DashboardPress Enter twice.
This leaves some space for dashboard sections.
Step 9.3 Create an “Active Clients” Section
Type:
/heading 1Select Heading 1.
Type:
👥 Active ClientsPress Enter.
Now type:
/linkedChoose Create linked view of database.
Step 9.4 Select the Clients Database
A window will appear asking which database you want to display.
Choose:
Clients
Notion will insert another copy of your Clients database.
Don’t worry, this is not a duplicate database. It’s simply another view of the same information.
Step 9.5 Filter Only Active Clients
Move your mouse over the linked database.
Click the Filter button near the top of the database.
Choose:
Status
↓

Is

↓

Active
Now only active clients will appear.
Step 9.6 Create an Upcoming Deadlines Section
Press Enter below the Active Clients section.
Create another Heading 1.
📅 Upcoming DeadlinesPress Enter.
Type:
/linkedSelect:
Create linked view of database
Choose:
Projects
Step 9.7 Filter Upcoming Deadlines
Click Filter
Create these rules:
Deadline

is within

Next 30 days
(Optional)
Status

is not

Completed
Now your dashboard only shows projects that need attention soon.
Step 9.8 Add Recent Meeting Notes
Create another Heading.
📝 Recent Meeting NotesIf you created a separate Meeting Notes database earlier, create another linked database and select it.
If your meeting notes are stored inside each client page instead, you can skip this section or create a simple text area where you paste your latest meeting summary.
Step 9.9 Add Unpaid Invoices
Create another Heading.
💳 Unpaid InvoicesInsert another linked database.
Choose:
Invoices
Click Filter
Set:
Payment Status

is

Unpaid
Now only unpaid invoices appear.
Step 9.10 Add Quick Links
At the bottom of the dashboard, create another Heading.
🚀 Quick LinksBelow the heading, add links to pages you open frequently.
For example:
- Projects
- Invoices
- Clients
- Meeting Notes
To add a page link:
Type:
@Start typing the page name.
For example:
@ProjectsSelect it from the suggestions.
Repeat for the other pages.
Your Dashboard Should Now Look Like This
Client Dashboard

👥 Active Clients

(filtered Clients database)

-----------------------------------

📅 Upcoming Deadlines

(filtered Projects database)

-----------------------------------

📝 Recent Meeting Notes

-----------------------------------

💳 Unpaid Invoices

(filtered Invoice database)

-----------------------------------

🚀 Quick Links

Projects

Invoices

Clients

Meeting Notes
Step 10: Test Your Dashboard
Before using your dashboard with real clients, it’s a good idea to test everything with sample data. This helps you confirm that your databases, relations, and filters are working correctly.
Step 10.1 Create a Sample Client
Open the Clients database.
Click the blue New button.
Enter the following information:
| Property | Example |
|---|---|
| Client Name | ABC Marketing |
| Status | Active |
| Industry | Marketing |
| Contact Email | [email protected] |
| Phone Number | +1 555-123-4567 |
Step 10.2 Add a Project
Open the Projects database.
Click New.
Enter:
| Property | Example |
|---|---|
| Project Name | Website Redesign |
| Client | ABC Marketing |
| Status | In Progress |
| Deadline | Next Friday |
Because the Client property is a Relation, select ABC Marketing from the list instead of typing it manually.
Step 10.3 Add an Invoice
Open the Invoices database.
Create a new invoice.
Example:
| Property | Example |
|---|---|
| Invoice Number | INV-001 |
| Client | ABC Marketing |
| Amount | $1,500 |
| Payment Status | Unpaid |
| Due Date | Next Monday |
Step 10.4 Add a Meeting Note
Open the ABC Marketing client page.
Scroll to the Meeting Notes section.
Add a simple note like this:
20 July 2026

Discussed homepage redesign.

Client requested a mobile-first layout.

Next meeting scheduled for Friday.
Step 10.5 Check Your Dashboard
Return to the Client Dashboard page.
Take a moment to review each section:
- Active Clients should display ABC Marketing.
- Upcoming Deadlines should list the Website Redesign project if its deadline matches your filter.
- Unpaid Invoices should show INV-001.
- Meeting Notes should be available from the client’s page or your notes database.
- Quick Links should open the correct pages with one click.
If all the information appears where you expect it, your dashboard is ready to use.
Pro Tip
Don’t try to build the perfect dashboard on your first day.
Start with a simple client database, use it for a week, and then add extra features like project tracking, invoices, and automation as your workflow grows. A dashboard you actually update is far more valuable than a complex one you never open again.
The Two-Layer Structure
Most client dashboard failures come from treating it as one giant page instead of a system with two layers:
Layer 1 — The Master Client Database. One row per client, with high-level fields: status, contact info, total value, relationship start date. This is your bird’s-eye view — scan it and know your entire client base at a glance.
Layer 2 — Individual Client Pages. Each client’s row opens into its own page with deeper detail: project history, meeting notes, invoices, and files specific to them. This is where the actual working detail lives.
The mistake most people make is trying to cram everything into Layer 1, which turns a clean database into an unreadable wall of columns. Keep the master list high-level; push detail down into each client’s own page.
Setting Up the Master Client Database
Create a new page, type /table, and title it “Clients.” Build these columns:
| Column | Property Type | Purpose |
|---|---|---|
| Client Name | Title | Primary identifier |
| Status | Select | Active / Paused / Prospect / Completed |
| Industry | Select | Quick context at a glance |
| Contact Email | One-click access | |
| Total Project Value | Number (currency) | Lifetime value per client |
| Relationship Start | Date | How long you’ve worked together |
| Next Action | Text | The single next thing that needs to happen |
That “Next Action” column matters more than it looks. It’s the difference between a static contact list and a genuinely useful dashboard, every client row tells you exactly what to do next without opening the full page.
Building the Individual Client Page
Click into any client row, and you’ll land on that client’s dedicated page. This is where the real detail lives. Set up four sections:
Contact & Contract Info — a simple block at the top with their contact details, agreed rate, contract terms, and any special notes (communication preferences, time zone, billing quirks).
Project Tracker — a linked or embedded database showing every project or deliverable for this specific client, with status, deadline, and priority. If you already have a master Projects database elsewhere, use a Relation property to connect it instead of duplicating data.
Communication Log — a simple running list or table logging key conversations: date, topic, and outcome. This single section eliminates the “wait, did we agree to that on the call or in an email?” problem almost entirely.
Invoices & Payments — either an embedded view of your Income database filtered to this client, or a simple table if you’re not tracking finances elsewhere yet.
Comparing Two Dashboard Depths
| Approach | What’s Included | Setup Time | Best For |
|---|---|---|---|
| Lightweight Dashboard | Master table only, no individual pages | 20–30 min | Under 5 clients, simple relationships |
| Full Client Dashboard | Master table + individual pages with 4 sections | 90–120 min | 5+ clients, ongoing/recurring work |
Don’t build the full version if you only have two or three simple clients, that’s solving a complexity problem you don’t have yet. Start lightweight, upgrade to the full structure once you feel the master table alone isn’t giving you enough detail per client.
Connecting It All With Relations
The single feature that makes this genuinely powerful rather than just organized is Notion’s Relation property. Link your Clients database to your Projects database, and your Projects database to your Income database. Once connected:
Open any client, and you instantly see every project tied to them. Open any project, and the client and any related invoices are right there. This removes the need to manually cross-reference three separate lists every time you need a full picture of a client relationship.
Set this up once and it maintains itself every new project or invoice you tag with the right client automatically shows up everywhere it’s relevant.
A Freelance Consultant’s Actual Setup
Daniel runs a solo consulting practice with eight active clients, ranging from a single small monthly retainer to a large ongoing engagement with weekly calls. Before building a Notion dashboard, his client information lived across Gmail search, a rough spreadsheet he updated inconsistently, and his own memory of what was discussed on recent calls.
He built the master Clients table first, populating the Status and Next Action columns for all eight clients in one sitting, which alone surfaced two clients he’d been meaning to follow up with but had genuinely forgotten about. Individual client pages came the following week, starting with his three largest accounts before extending the structure to the smaller ones.
The Communication Log section turned out to be the highest-value addition, unexpectedly. Before a recurring client call, a two-minute scan of the log reminded him exactly what was discussed last time, without needing to search his inbox. He described the biggest shift as no longer feeling like he was “reconstructing” each client relationship from scratch before every interaction, the context was just there, waiting.
Mistakes That Undercut a Client Dashboard
Before building yours, these are the patterns that consistently turn a promising setup into an abandoned one:
- Cramming too much into the master table. If scanning your Clients database takes real effort, you’ve built a spreadsheet, not a dashboard. Push detail down to individual pages.
- Never updating the “Next Action” field. This column is the entire point of the master view, leaving it stale defeats the dashboard’s core purpose.
- Duplicating client info instead of using Relations. Typing the same client name into three separate databases means three places that can drift out of sync.
- Building the full structure for every client on day one. Start with your most active or highest-value clients; extend to the rest once the system proves itself.
- Skipping the Communication Log because it feels tedious. It’s the section that pays off the most during an actual call, precisely because it’s the one people skip.
- Never reviewing stale client statuses. A “Prospect” from eight months ago that never converted should be archived or marked accordingly, an outdated dashboard erodes trust in the whole system fast.
Advanced Additions Worth Making Later
Once the basic structure has run for a few weeks and feels natural, a few additions pay off:
A rollup for total revenue per client, using Notion’s Rollup property against your Income database, instantly see lifetime value without manually calculating it.
A “Last Contact Date” formula field that flags any client you haven’t spoken with in over 30 days, useful for surfacing relationships that are quietly going cold without you noticing.
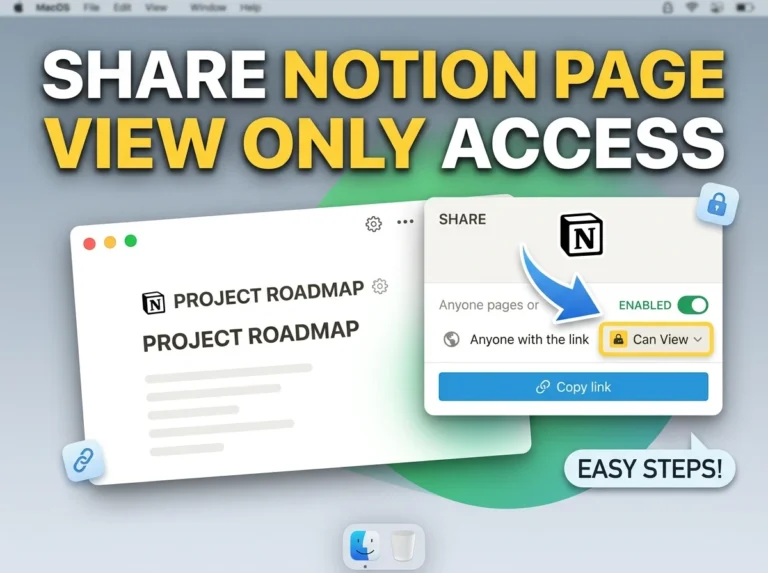
A shareable client-facing view — Notion allows you to share a filtered, read-only version of a project tracker directly with a client, giving them visibility into their own project status without exposing your other clients’ information.
FAQs
- Do I need Notion’s paid plan to build this? No. Everything described here, databases, relations, rollups, formulas works fully on Notion’s free plan for individual use. Paid tiers matter more for team permissions and larger collaborative needs.
- How many clients before this system becomes worth building? Around three to five active clients is usually the point where memory and scattered notes start failing you. Below that, a lightweight version is often enough.
- Can I share part of this dashboard with a client without giving them access to everything? Yes. share a specific page or a filtered database view rather than your entire workspace. This keeps other clients’ information private while still giving them visibility into their own work.
- What’s the difference between using Relations and just typing the client name into every table? Relations keep the data connected and consistent, update the client’s info once, and it reflects everywhere. Typing the name manually into multiple places means each entry can drift out of sync over time.
- How do I handle former or inactive clients – delete them or keep them? Keep them, but change their Status to “Completed” or “Inactive” rather than deleting the page. You’ll often want that history if they return, and deleting removes useful context permanently.
- Is this overkill for someone with only one or two clients? Likely, yes. The lightweight version, just a master table, no individual pages covers that scale fine. Build the full structure once you’re managing enough relationships that memory alone starts failing.
- Can I track time spent per client in this same dashboard? Yes, add an Hours Logged field to your Projects database, related back to each client. It won’t replace a dedicated time-tracking tool for precision, but it’s serviceable for a general view.
- How do I make sure I actually keep this updated instead of letting it go stale? Build a quick update into an existing habit, updating the Next Action field right after every client call or email exchange, rather than treating it as a separate task to remember later.
- What if my client relationships don’t fit neatly into a single template? Adjust the sections to match what you actually need, not every client needs a Communication Log if most of your work with them happens in a single, well-documented project thread. Customize per relationship type if it helps.
- Can I use this dashboard for prospects too, before they become clients? Yes. A “Prospect” status in your master table works well for this, and you can build out a lighter version of the client page for pipeline tracking without needing the full structure applied yet.
Where to Start
A client dashboard doesn’t need to be elaborate to be useful, it needs to actually answer, in seconds, who you’re working with, what’s happening, and what’s owed. Start with the master Clients table alone if that’s all you need right now. Add individual pages for your two or three most active relationships first, not all of them at once.
Give it two weeks of genuinely updating the Next Action field after every interaction. That single habit, more than any database structure, is what turns this from a one-time setup project into something you actually rely on.