
Why do so many Notion daily planners get built once, used for four days, and then quietly abandoned? It’s rarely because Notion is too complicated. It’s because most beginner tutorials show you a beautifully designed planner someone else built for their own life, and you copy the structure without understanding why any of it exists, so the moment your day doesn’t match the template, the whole thing stops making sense.
This guide takes the opposite approach. You’ll build a genuinely simple daily planner, piece by piece, understanding what each part is for, so when your day looks different from the example, you already know how to adjust it yourself instead of abandoning the page entirely.
What a Daily Planner in Notion Actually Needs

Strip away the aesthetics, and a working daily planner answers three questions every morning:
- What absolutely needs to happen today?
- What time-based commitments do I have?
- Where do I stand on anything I’m tracking longer-term?
That’s genuinely it. Beginners often add mood trackers, gratitude logs, and habit grids before they’ve even used a basic version for a week. Those additions aren’t wrong, they’re just premature. Build the plain version first.
Research on habit formation and routines — James Clear
Before You Start: Mistakes That Kill Beginner Planners Early
It’s worth naming these before you open Notion, because avoiding them matters more than any specific design choice below:
- Copying an elaborate template on day one. A planner with 12 sections you didn’t design yourself is hard to maintain, you don’t know what to cut when it stops fitting your day.
- Designing for an idealized day instead of your actual one. If your days are unpredictable, a rigid hour-by-hour block structure will feel like failure by 10 AM. Build flexibility in from the start.
- Adding databases before you need them. A simple checklist works fine for weeks. Relations and rollups can wait until you actually feel a gap.
- Never opening it at a consistent time. A planner only works if checking it becomes part of your routine, same time, same trigger, every day.
- Perfecting the visual layout before testing function. Cover images and icons can wait. Test whether the structure holds up for a week before decorating it.
Step-by-Step: Building Your First Daily Planner
Get started with Notion for free
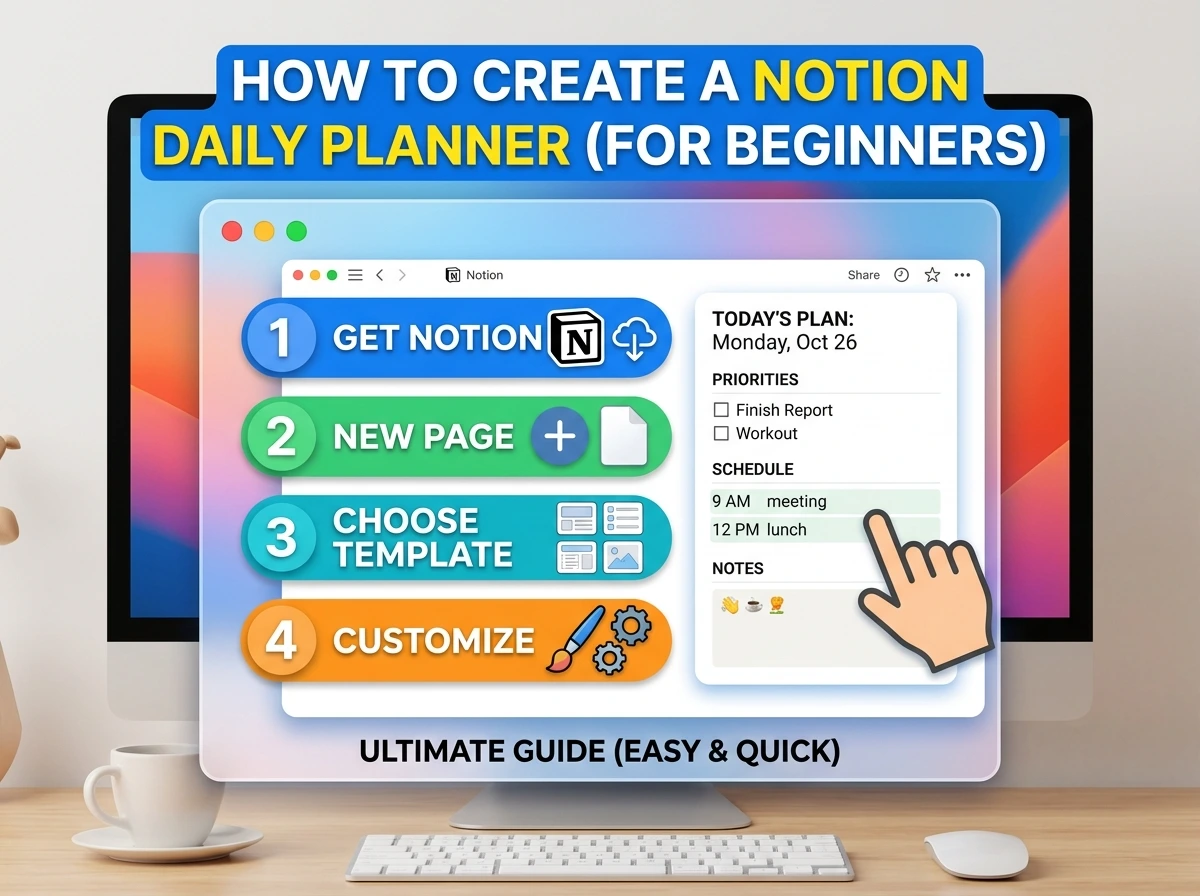
Step 1: Create the Page
- Open Notion.
- In the left sidebar, click + New page.
- Name the page Daily Planner.
- Leave the page blank instead of choosing a template.
Why?
Building the planner yourself helps you understand how each element works, making it easier to customize later.

Step 2: Add a Live Date Header
- Click at the top of the page.
- Type /date.
- Select the Date block.
- Insert today’s date.
Why?
Adding the date helps you immediately identify the planner for the day and prepares the page to become a reusable template later.

Step 3: Add Your “Top 3” Section
- Press Enter to create a new line.
- Type Today’s Top 3 and format it as a heading.
- On the next line, type /to-do.
- Create exactly three checklist items.
Example:
- ☐ Finish project proposal
- ☐ Exercise for 30 minutes
- ☐ Reply to client emails
Why only three?
Limiting yourself to three high-priority tasks encourages focus instead of creating an overwhelming to-do list.


Step 4: Add a Time-Blocked Schedule (Optional, But Useful)
- Press Enter below your checklist.
- Type Schedule as a heading.
- Create a simple table with two columns:
- Time
- Task
4. Fill in your fixed commitments first.
| Time | Task |
|---|---|
| 9:00 AM | Client call – project review |
| 10:00 AM | Deep work block |
| 1:00 PM | Lunch |
| 2:00 PM | Admin / email |
| 4:00 PM | Deep work block |
Tip:
Leave some empty time between tasks. A schedule that’s packed every hour is difficult to follow when unexpected work appears.


Step 5: Add a Quick Notes Section
- Scroll below your schedule.
- Create a heading called Notes / Brain Dump.
- Leave a blank text area underneath.
Use this section to capture:
- Random ideas
- Things to remember
- Meeting notes
- Quick reminders
- Tasks you’ll organize later
Why?
Instead of interrupting your workflow, you have one place to quickly capture thoughts before returning to your current task.

Step 6: Turn It Into a Repeatable Template
Once you’re happy with the layout:
Option 1: Turn the Page into a Template
- Click the ••• menu in the top-right corner.
- Choose Turn into template (if available).
Notion’s guide to templates and template buttons
Option 2: Use a Database Template (Recommended)
- Create your planner inside a Notion database.
- Click New ▼.
- Select + New Template.
- Save your planner layout as the default template.
Now, every morning you can create a fresh planner with a single click instead of rebuilding the layout or reusing yesterday’s page.
Basic vs. Slightly Advanced: Which Fits You Right Now

| Element | Basic Version (Start Here) | Slightly Advanced (Add Later) |
|---|---|---|
| Task list | Simple checklist, 3 items | Linked database view filtered by due date |
| Schedule | Manual two-column table | Calendar view synced with Google Calendar |
| Notes | Plain text block | Linked to a searchable Notes database |
| Repeat structure | Duplicate page manually | Notion template button, one-click creation |
| Review habit | None yet | Weekly summary page linking each daily planner |
Stay in the Basic column for at least two weeks before considering anything in the Advanced column. Most beginners who jump straight to database views and calendar syncing lose the plot of what the planner is actually for.
How This Looks in Practice
Picture a college student building her first Notion planner during exam season. She starts with exactly what’s outlined above a date header, three priority tasks, a rough schedule, and a notes section. The first few days, her “Top 3” list is a bit off, she under-guesses how long revision actually takes. By day four, she’s adjusting the number of tasks she commits to instead of feeling like she failed the plan.
That adjustment is the entire point. The planner isn’t meant to be right on day one. It’s meant to be simple enough that she can see what’s not working and fix it, rather than abandoning a complicated system she never fully understood in the first place.
Pro Tips Once You’ve Got the Basics Down
- Set a fixed time to open the planner, ideally the night before or first thing in the morning. The habit of checking it matters more than anything you put inside it.
- Use the “Today’s Top 3” limit strictly, even when you have more to do. Everything else goes into a separate, less urgent list, the constraint is what makes this section useful.
- Link your daily planner pages together in a simple database once you have a week of them. This lets you scroll back and see patterns, which days you consistently under- or over-estimate your time.
- Resist adding a habit tracker until you’ve missed noticing a habit gap on your own. Adding tracking before you feel the need for it usually means it goes unused.
- Review one week of planners every Sunday, just briefly. Not to judge yourself, but to notice what kept slipping so you can adjust next week’s structure slightly.
Frequently Asked Questions
- Do I need the paid Notion plan to build a daily planner? No. Everything described here works fully on Notion’s free plan. Paid tiers add AI features and expanded permissions, neither of which is necessary for a basic daily planner.
- Should I use a pre-made template instead of building from scratch? For your very first planner, building from scratch even simply teaches you what each part does, so you can fix it later without confusion. Templates are more useful once you already understand the structure and want to speed up setup for a second or third version.
- How long before a Notion planner actually becomes a habit? Most people need two to three weeks of consistent use before checking it feels automatic rather than effortful. Expect some friction in the first week, that’s normal, not a sign it’s the wrong approach.
- What if my days are too unpredictable for a time-blocked schedule? Skip strict time-blocking and lean more heavily on the “Today’s Top 3” section instead. Priorities work regardless of how structured your hours are; rigid time blocks only work if your days are relatively consistent.
- Can I access my planner on my phone? Yes, Notion’s mobile app is free and functional for checking and updating your planner on the go, though building the initial structure is easier on desktop. Notion mobile app page
- How do I stop myself from over-designing the page before using it properly? Give yourself a hard rule: no cover images, icons, or color coding until you’ve used the plain version daily for one full week. Function first, decoration after.
- Should my planner be a single page I reuse, or a new page every day? A new page each day, generated from a template, works better long-term, it gives you a running history you can look back on, rather than overwriting yesterday’s information.
- What if I miss a day entirely, does the whole system fall apart? No. Just create the next day’s page and continue. A missed day isn’t a broken system; it’s a normal part of using anything consistently over time.
- Can I connect this planner to my actual task manager, like Todoist? Not directly without third-party integrations, but many people don’t need to, a simple Notion planner can serve as your entire task system if your workload doesn’t require a separate dedicated tool.
- When should I add more advanced features like databases and calendar sync? Once the basic version has run smoothly for two to three weeks and you can point to a specific gap it’s not covering, not before. Adding complexity to solve a problem you haven’t actually felt yet usually just adds friction.
Where to Go From Here
A Notion daily planner doesn’t need to be impressive to work. It needs to answer three simple questions every morning, and it needs to still be there in three weeks, not abandoned after four days because it never fit how you actually live.
Build the plain version today a date, three priorities, a rough schedule, a notes section. Use it exactly as-is for two weeks before changing anything. Whatever gap you notice yourself wishing it filled by then is the only addition worth making next.